French Polish
before: 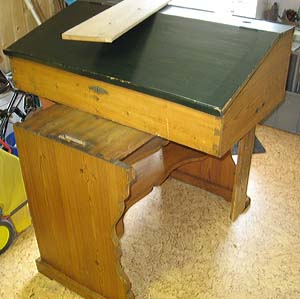 |
after: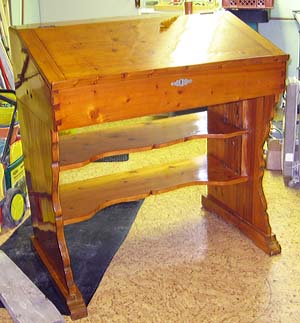 |
Many people shy away from the "king class" of the finishing.
But french polishing is not much more complex than finishing with a brush or spraycan. With both methods, you need to take time.
The fruits of my labor:
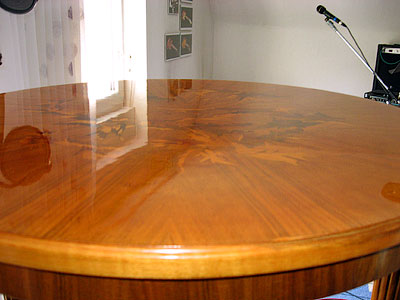
This table I've freed from his old, tattered coat, restored and refurbished in days of work with shellac..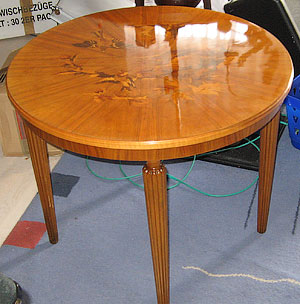 |
Old lectern that I liberated from old coats, cleaned, repaired and polished with shellac. |
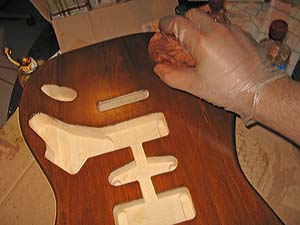
This guitar bodies have a high glossy shellac finish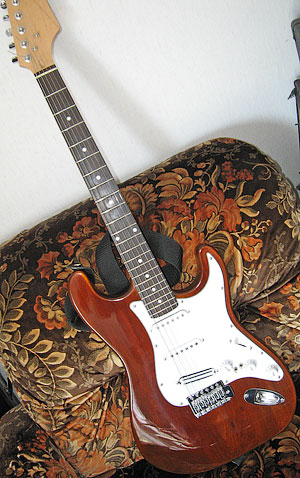 |
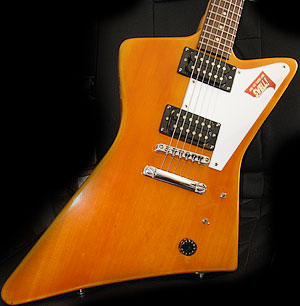 |
First of
I'm not a professional!
Although now I manage fairly good results, I'm sure there are still a lot of things that I do not know.
I
wrote this post because I believe that informations on french polishing
on the net are often not sufficiently detailed or even wrong.
Should one or the other reader to my explanations may contribute additional knowledge or even corrections ( email ), I would be very grateful. Im still learning.
Advantages and Disadvantages of a French polish
The advantages:
- Depth and luster are unmatched
- Polishing makes little dirt
- Shellac is not toxic
- Shellac surfaces can freshen up at any time
- It's excellent to work with at home
The disadvantages:
- Prolonged exposure to water caused water stains
- It is very sensitive to heat (eg, hot cup of coffee)
- It is not weatherproof
- It is not as scratch resistant as modern finishes
- Cleaning is best only with a soft cloth without any remedies
Conclusion:
If you want a durable surface you should go with modern finishes like PU. Those who want a beautiful glossy and non-toxic finish, should try Shellac!
Depth and shine of a french polished table top:
What distinguishes the French polishing process of "normal" paint job?
In the conventional brush or spray painting, you put on many coats, sand in between and finally sand to a flat surface. Then you polish the surface to a glossy finish.
French polishing consists of applying many thin coats of shellac dissolved in alcohol using a rubbing pad. It is applied in a circular motion, layer by layer thinly until a uniform glossy surface is achieved.
About Shellac:
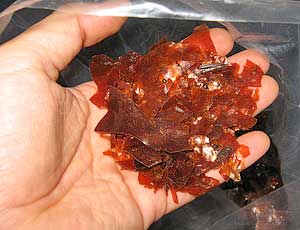
Shellac is a resin secreted by the female lac bug, on trees in the forests of India and Thailand.
Melted into thin sheets, it is usually waxy.
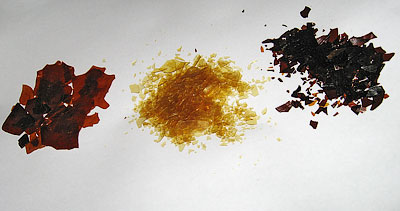
Shellac is available in several color concentrations (eg, garnet, orange, lemon, blonde) with wax and dewaxed.
The shellac dye is always the same, only the amount of dye in shellac varies from variety to variety.
Shellac can be desolved in 94% to 99% alcohol - see recipe.
Shellac availability:
You can buy shellac in various forms.
Waxy Shellac
- Is dissolved in alcohol
Wax-free Shellac
- Is dissolved in alcohol
Ready to use french polish
- Shellac dissolved in alcohol (optimally only alcohol and shellac, without other ingredients)
waxy Shellac Lemon handmade:
three common varieties:
Lemon handmade waxy / Blond dewaxed / Garnet dewaxed
Materials needed:
- 2 to 3 cotton or wool cloth wadding (eg socks)
- Linen fabric (not cotton but linen!) (coarse and fine)
- Shellac flakes
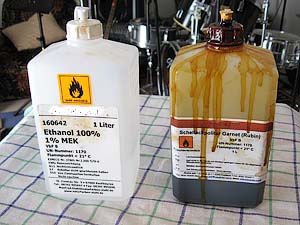
- Ethanol (denatured alcohol) (at least 94% better 99%)
- pumice (for pore filling)
- Oil (usually paraffin oil -I use canola oil or olive oil )
-2 to 3 glass jars with lids (for the pad)
- disposable gloves
- For beginners some pices of plywood or wood panels for practice
Ethanol and ready to use polish
The french polish (recipe):
Basic recipe: 250gr shellac to 1L alcohol (99%)
It is best du use dewaxed shellac!
when using waxy shellac
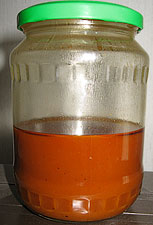
you need to be patient. After about a week you can already see
how the solids and the wax settle at the bottom.
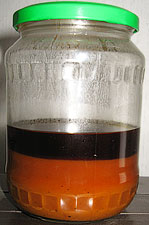
The clear wax-free solution can then be skimmed off.
A faster method is to filter through a coffee filter.
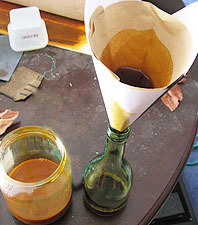
For the polishing process it can then be further diluted with alcohol.
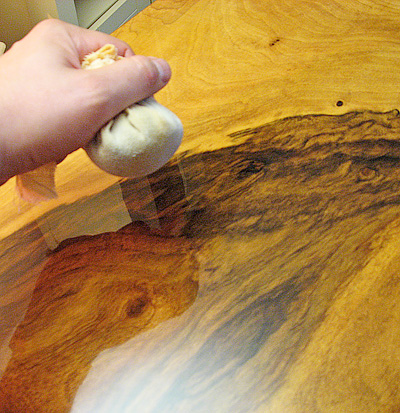
Polishing:
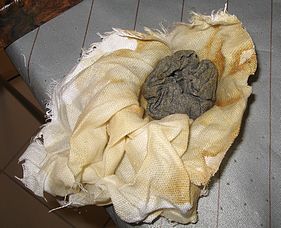
The most important tool is the polishing pad!
A polishing pad made of a wool core, which forms the tank for the liquid (shellac and alcohol) and a covering made of linen.
For the filling, traditional wool is used.
I use repeatedly washed socks and as coating linen
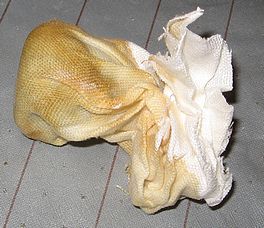
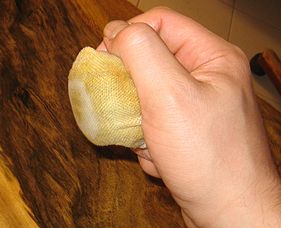
The pad size is individually adapted to the hand
and should allow for convenient working.
After polishing the pad is not thrown away, but after each polishing locked airtight in a glass. Only the coating will eventually wear out and will be replaced as needed.
Here we go!
First, the surface is sanded with 220 to 400 grid
working with the pad
There are basically two ways to fill the pad.
Either we give some of our basic mixture into the pad and then add some alcohol as needed, or we can use different cuts of french polish. We always fill our pad from behind, but it must not be dripping wet!
For
the pore filling, we work with very thin polish that contains only a
small amount of shellac (I use a 15 seconds mixture: if you shake the
mixture the resulting bubbles disappear within about 15 seconds). Now we go in a circular motion (circles, Make etc ...) on the surface without stopping. When the pad starts to grab we sparingly (eg with salt shaker) put some pumice to the area. If needed we add a little alcohol to the pad and then we rub the pumice in large circular movements into the pores. That requires a lot of effort, as the pumice sands and the shellac dries. We do this until the pad starts to dry.
This
process must be repeated often (depending on the pore depth of
approximately 3 to 8 times) until the pores are closed, but only once a
day!
When using too much pumice or too much shellac it can sometimes cause veil and deposits on the surface. Such we can not remove with the pad. We let it dry and sand lightly over the place with 220 paper.
We now fill the pad with shellac (approx. 100g shellac to 1 liter of ethanol) until the pad is moist (not wet!!). It should not be added too much shellac. Before each application, we check whether the pad track is clean and smooth. Small wood chips or wrinkles in the coating can cause scratches when polishing.
We
now give a few (1-2) drops of oil on the surface of the pad and begin
to polish in the direction of the grain, we never start or stop the pad
on the surface - think of an airplane during starting or landing. The pad must be kept on the surface in a timely motion, otherwise the emerging shellac dissolves the already applied shellac.
Please make sure that the edges get enough shellac.
In order to achieve a uniform distribution of the shellac, working in random, circular motions with firm, but even pressure. With the pad we go into the corners and edges.
Once the pad starts to dry, add shellac or alcohol to the pad.
If
the pad starts to grab on the top add a drop of oil to the outside of
the pad. As this acts as a lubricant and stops the grabbing action. The
alcohol evaporates so fast as the shellac hardens and grabs the weave
of the pad.
When
properly used a cloud is left behind the pad as it lays on the shellac
indicating the evaporation of the alcohol on the surface. It should leave no wet trace behind.
A good french polish takes time!
To remove the remaining oil, take a cotton rag, put a little bit of alcohol on it - it should be slightly damp (nearly dry) and gently glide it on the top.
The polished surface remains sensitive for a few weeks or months, as the shellac still dried.
_____________________________________________________
This text reflects my experience with shellac and does not claim to accuracy or completeness!